MAC At-A-Glance
[November] 11/26 - Monogram - MAC's annual couture collection, 11/30 - Perfect Style
[December] 12/26 - Dame Edna, Chill
The MAC Paint Pot. Great as a base, packaged adorably in glass containers, a multitude of colors to choose from... it's just a MAC Collector's dream!
MAC Paint Pots were (and still are) a HUGE deal when they were released in August 2007. After befriending them and adopting most of them, I can proudly say that my Paint Pots do get the ultimate spa treatment.
From my recent post about mingling with the Pros at the Nordstrom's MAC Technique Class, it seems that some light was shed on storing the infamous jars of color. Storing the Paint Pots upside down helps keep the product from drying out.
I've been doing this for quite some time now and thought I'd share with you exactly how I store mine.
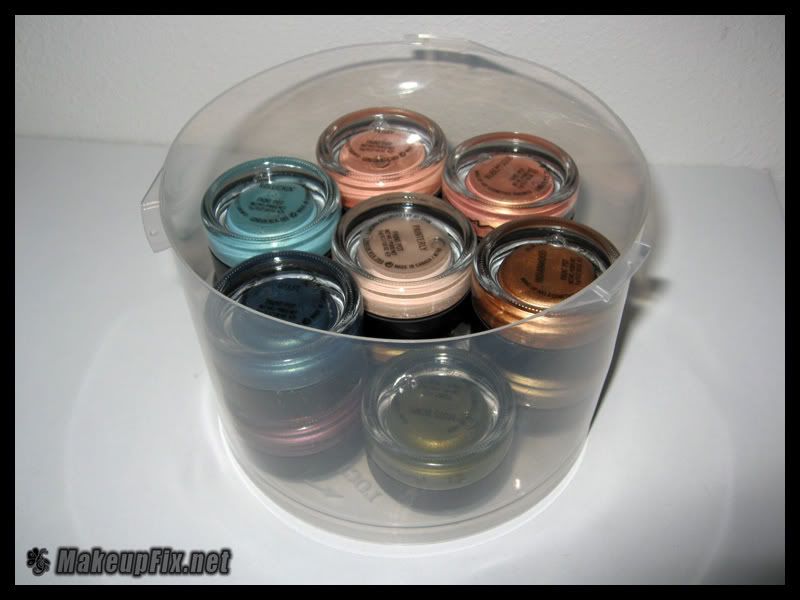
Since I have more than a handful of these glassed beauties, I store them upside down in an empty CD spindle container. When arranged like how I've done below, the jars fit nicely with a little tough love. This is my "I-don't-have-a traincase" way of doing things. And with CD burning almost a reflexive pastime, most people are bound to have a couple of the spindle containers laying around.

I keep my Paint Pots stored in the bedroom since the steam from the shower causes the bathroom to fluctuate in temperature. Considering that most people shower on a daily basis, that's a lot of temperature changes your Paint Pots have to go through. And don't forget to factor in other people that use your bathroom. More chances for it to spoil sooner.
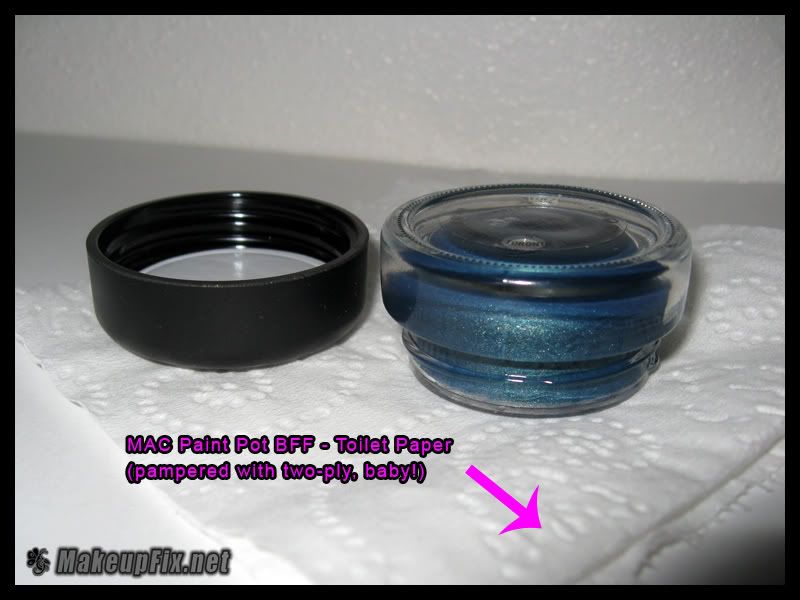
When I'm doing my makeup and I am using a Paint Pot, I still make sure to keep them facing upside down. So in between loading up my brush with product, I just face it down on the counter on top of a clean piece of toilet paper (aka Paint Pot BFF). That way it isn't touching any not-so-clean surfaces yet making it easy to grab product without having to screw the lid on and off each time.

So what happens should your Paint Pot take a turn for the worse and become deathly ill (symptoms of this are noted as dried out product and possible cracking)? When things dry out, our gut says to quench the thirst. Here are a couple of ideas you may want to put to the test:
- Scraping off the top layer.
- Add a bit of mixing medium or Fix+ to help moisten the Paint Pot.
- Moisturize the bristles of your brush with moisturizer prior to dipping in the Paint Pot.
When trying to bring life back to your Paint Pots, transfer part of the product to another container to test. This will allow you to keep the remaining separated in case the test doesn't turn out to your liking.
Paint Pot Maintenance:
- Store MAC Paint Pots in an area where room temperature is constant; not in the bathroom or car.
- Transfer part of the product to a smaller container and replenish as needed.
- Ensure the lids are tightly screwed on when not in use.
- Always keep Paint Pot jars faced upside down; when in use and not.
MAC Paint Pot sure can be high maintenance products, but better to take care of them like the good makeup parents we are.
Do you have other products that are worthy of the spa treatment?
Aloha,
Mrs. Lynne
Did you find this post helpful? Then don't forget to mention us in your post, link to us, subscribe to our feed, or have email updates sent directly to you!
Share and Enjoy your MakeupFix!
I attended a Nordstrom's MAC Technique Class today in which emphasis was on evolving a simple day look and fine tuning it throughout the day to eventually end the night looking just as fun yet hot!
There were about 20-25 of us ladies in the house and we had two excellent MAC Artists facilitating our class, Yvette and Tiffany. They each had one lovely lady from the audience as a model and the looks that they had for each girl complimented them very well. The transformation as they took it from day to night was just an amazing thing to watch. Not to mention they each got a lovely pair of lashes to go along with their makeover!
Throughout the course, we got to see how the Makeup Artists put their brushes to use. It never occurred to me to use my MAC 187 to apply my moisturizer nor did it dawn on me to use my 217 to put on my eye cream. Sounds pretty obvious, right? Well, this definitely attests to the fact that the obvious isn't always, well... so obvious (at least to me, hah).
As they transitioned from skin prep, to eye makeup, to finishing off the face, they would do a "shop stop" in between each so that us attendees could grab what we wanted while the information was still fresh in our minds. Professionally, I say good sales tactic matey! Le Visa Debit says "arg".
But as the two hours of knowledge finally dwindled to an end, I was thankful to my MAC binge over the past 5 months because I had already accumulated more MAC products over time that visual lessons like these allow me to just pick up things here and there. Walking away with the MAC Mineralize Loose Powder, Fast Response Eye Cream, and Painterly Paint Pot, I felt good knowing that things were within reason - yay me!
So after an exceptional time in the hands of Nordstrom's and MAC's finest, here are some tips straight from the Pros:
- For those who aren't as comfortable with pops of color during the day, looks are well played with neutral eyeshadow choices. Preferably matter or satin finishes. But night-time is always a fun time, so don't be scared to play with some color within your comfort level.
- The use of a brown liner on the waterline (such as Brown Border Technakohl) emphasizes your eyes in a much softer way than using black.
- Lining the lower lashline also emphasizes more defined eyes. Lining eyes halfway (from the outer to the middle) allows eyes to appear more open.
- The lip difference between day and night can be as simple as giving lips some shine with some lipgloss and/or going a shade deeper from the day pouters.
- Know where you're placing your eyeshadow on your brush. Do not grind the brush into the pot as too much product will be deposited into the bristles. Blending brushes like the MAC 224 only need color on the tips in order to create precise placement.
- Make sure your paint pots and fluidline jars are tightly shut and stored upside down to prevent drying. I also always make sure to turn my jars upside down when I use them to make sure they're not exposed to air for long periods of time. I'm scared of my gorgeous colors drying out on me!
- If you use a brow setter, brush the gel in the direction against the hairs first then along the direction of growth to coat both sides and maximize staying power.
- When applying eyeshadow/base on the eyelids, hold the brush bristles down and deposit eyeshadow/base near the lashline sweeping up and blending out.
- If you wear sleeve-less shirts, you may want to consider buffing cheeks with a bronzer so as to match your face to your shoulder.
- When lining eyes, use the side of the brush starting from the middle and working outward. Once the guideline is established, line the inner part connecting to the initial line started in the middle (this is exactly what I do).
Wow! Is that a cheat sheet or what? No matter what level you are in your makeup application, it's always good to refresh, if not add to, the knowledge you already have. You can never OVER-saturate yourself with knowledge.
So you got the skinny on some notes I took for you folks. But you know I wouldn't leave you hanging without showing you how I showed up to class, right?
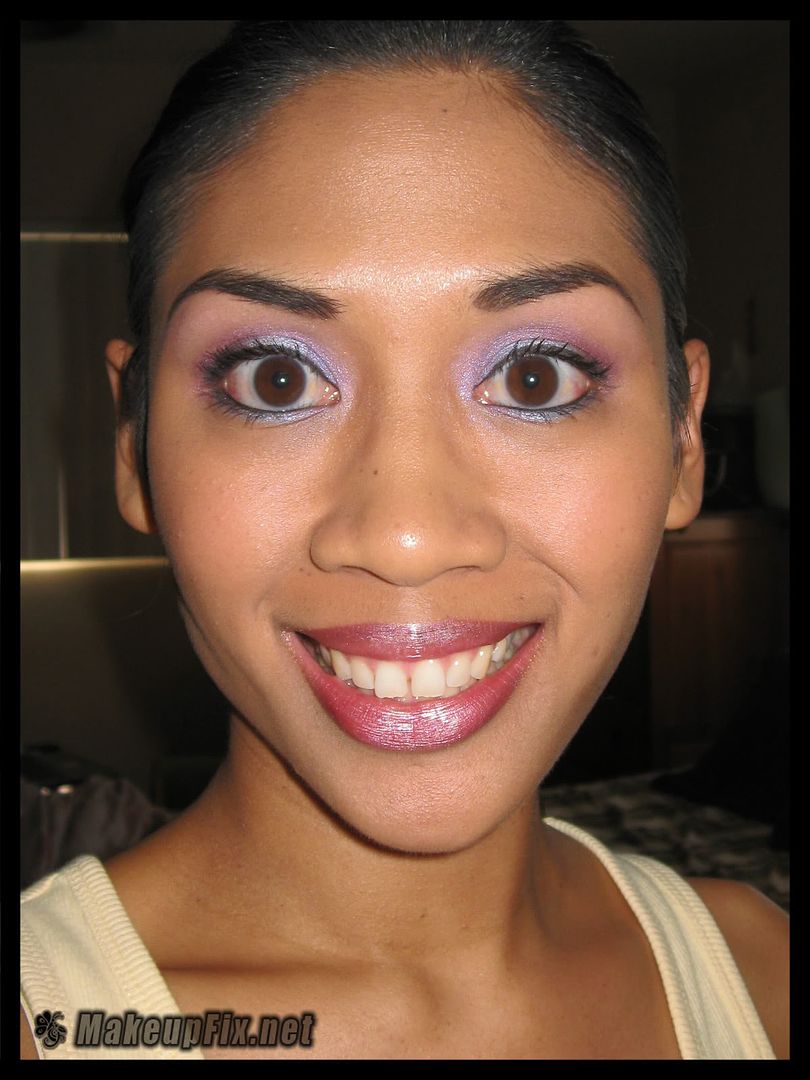
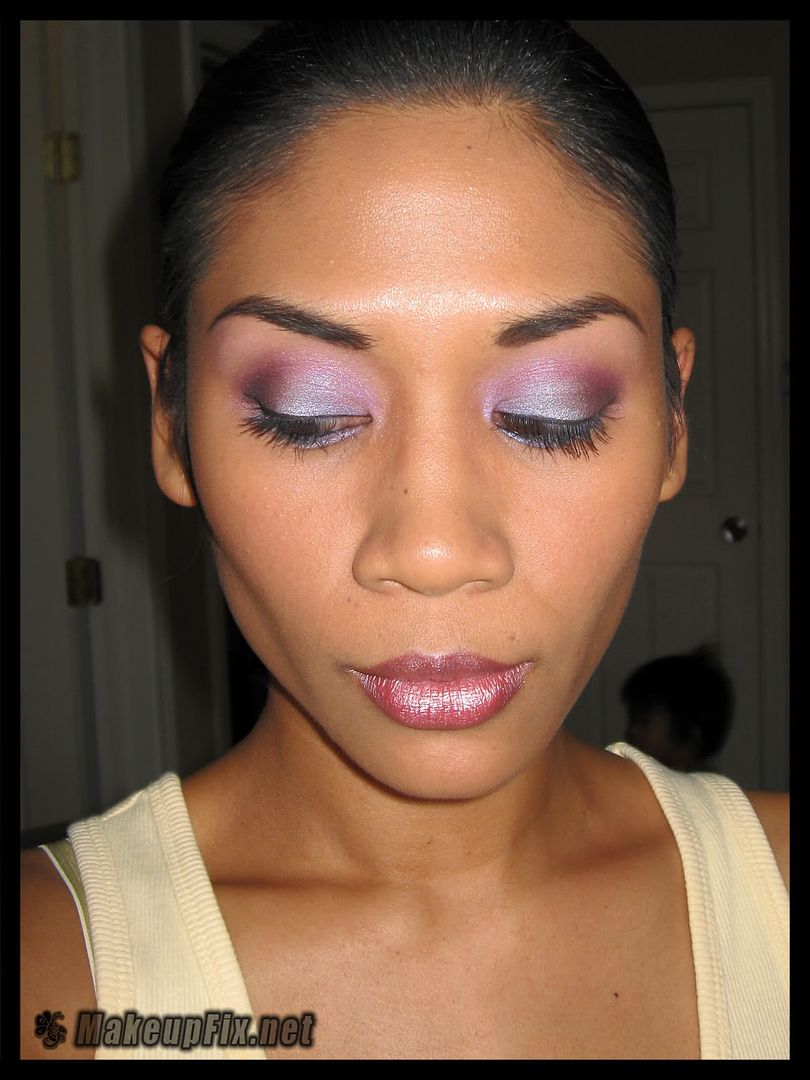
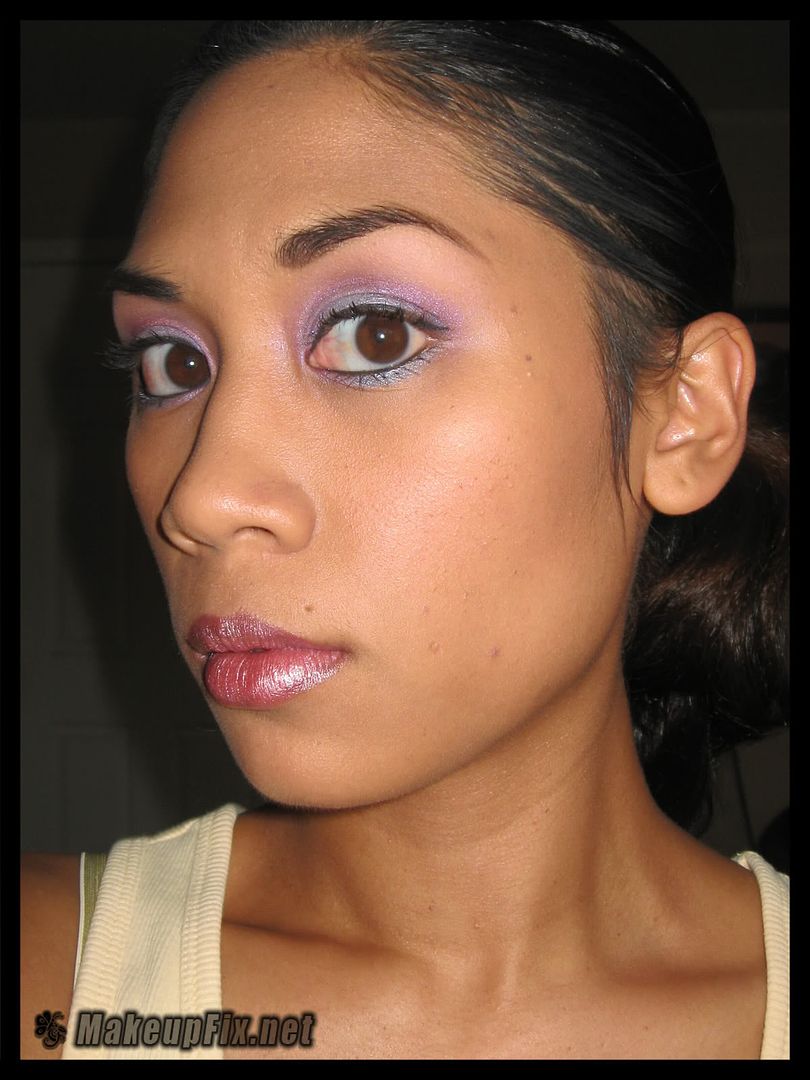
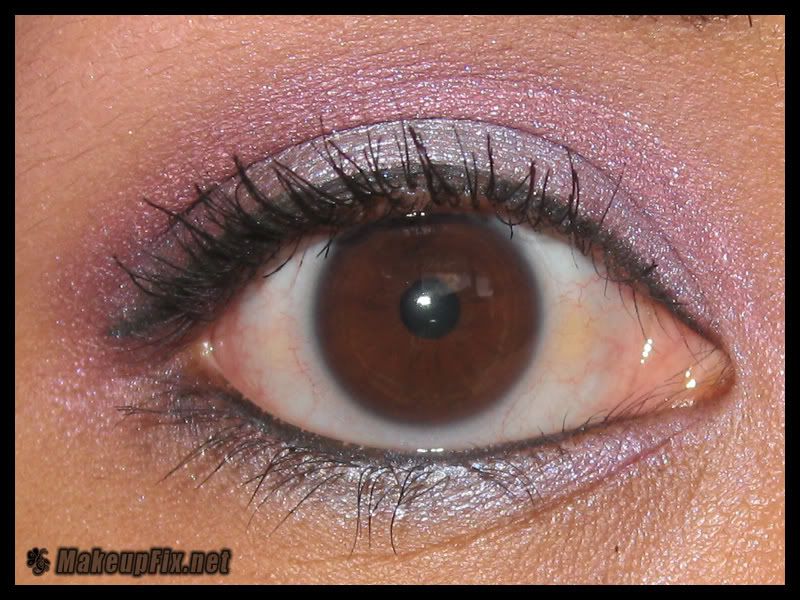
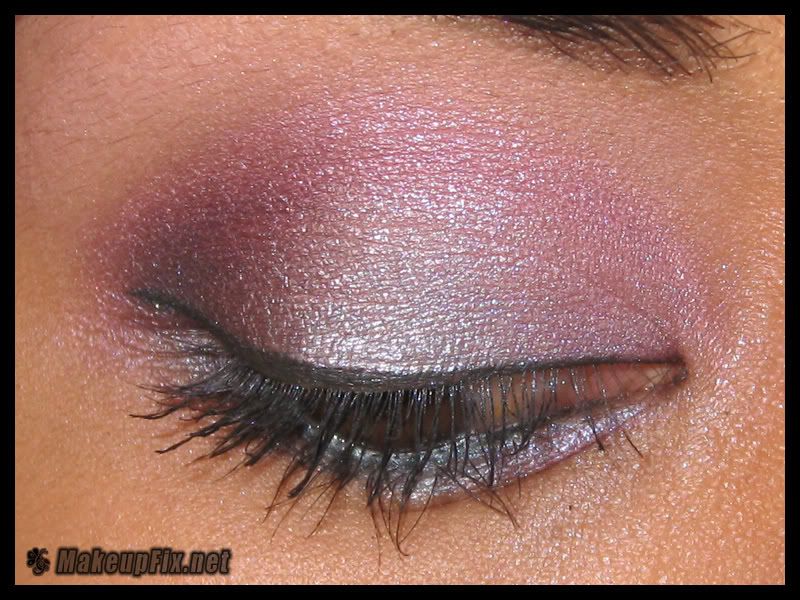
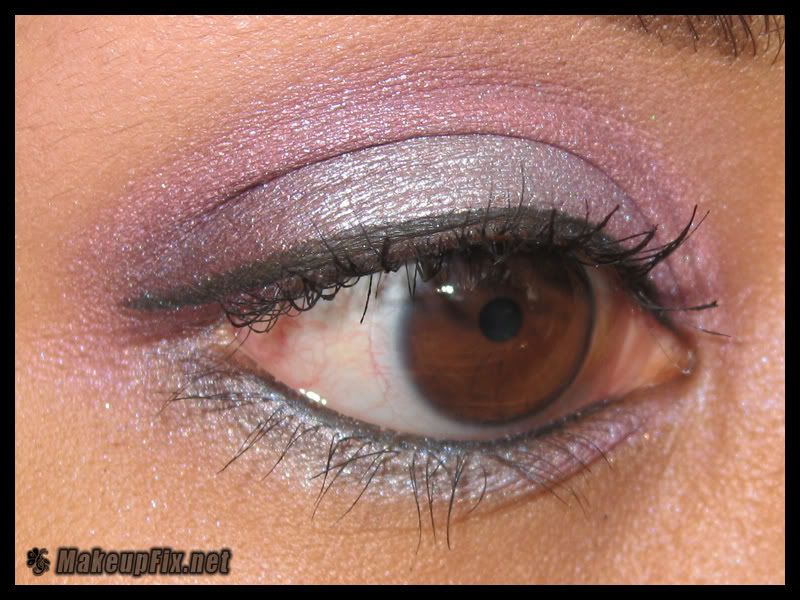
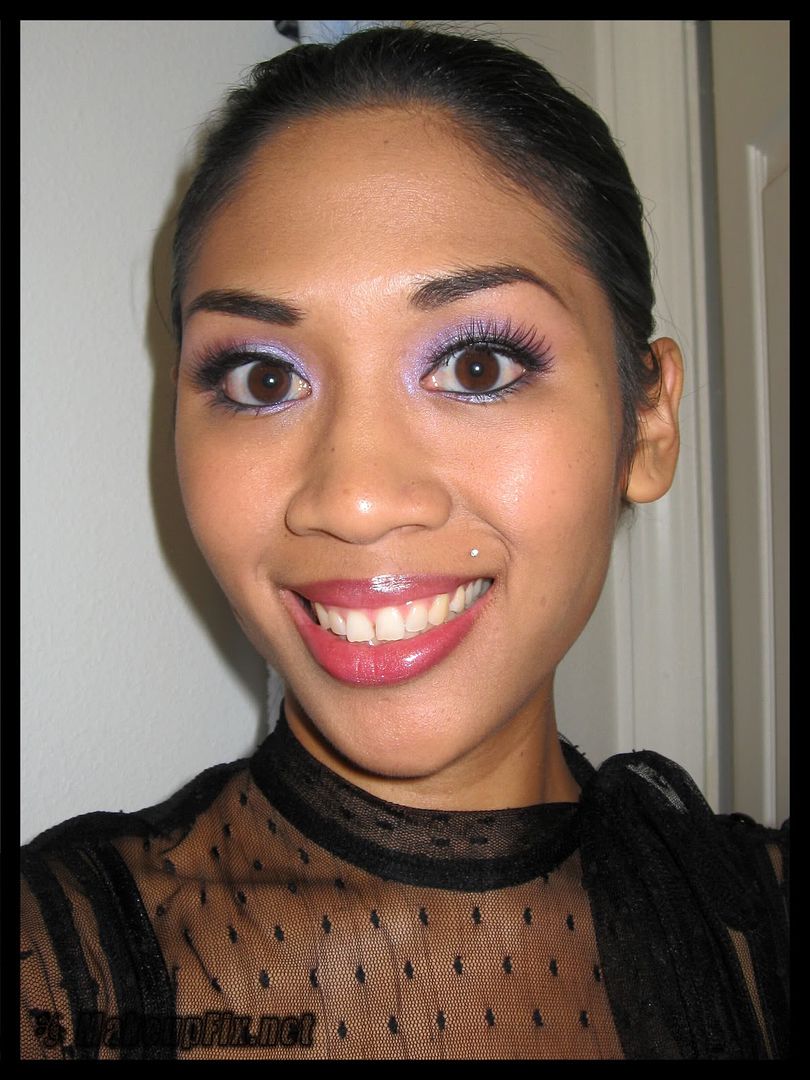
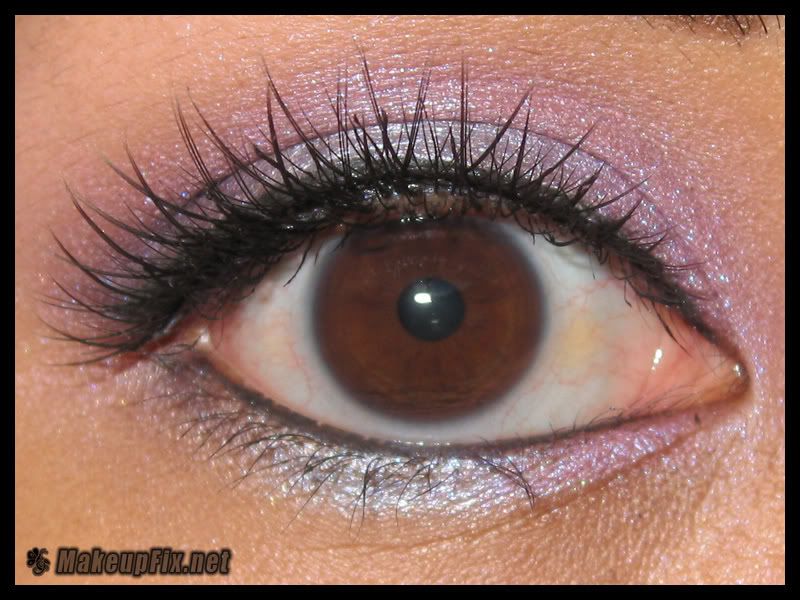
From the recent release of Heatherette for MAC, I welcomed one of my first MAC pigments to the collection, Pink Pearl. I paired this gorgeous duo chromatic pink with blue pearl pigment with Moon's Reflection and Hepcat eyeshadow along the lid. Using my HG Signed, Sealed from Matte2, I darkened the outer V slightly but made more emphasis with Carbon, placing it at the very corner to really create the depth.
The first set of photos was my trial run with the look while the last two photos are spruced up with some new NYX falsies I hauled and evidence of what I wore to class. What a difference lashes make, yah?
I hope your weekend is full of color folks!
Aloha,
Mrs. Lynne
FACE
Monistat Chafing Relief Powder-Gel
Studio Finish Concealer NW35 (224)
Buff'd Caramel (182)
Secret Blush Beauty Powder Blush (169)
Shadester/Lightsweep Sculpt & Shape Powder (169, 129)
BROWS
STILA Brow Set (266)
EYES
UDPP
Frisco Rose p/p with moisturizer (lid - 252)
Frisco e/s (highlight - 217)
Moon's Reflection e/s (entire lid, middle lower lashline - 239, 219)
Pink Pearl Pigment (inner lid, inner lower lashline - 239, 217, 219)
Hepcat e/s (outer lid, crease - 239, 217)
Signed, Sealed e/s (outer V, outer lower lashline - 217, 219)
Carbon e/s (outer V - 219)
Blacktrack f/l (upper lashline - 208)
Graphblack Technakohl (waterline)
Prep & Prime Lash & Covergirl Lash Blast
LIPS
NYX Pandora & Galaxy
 You can hardly tell in the photos, but I used Secret Blush Beauty Powder Blush lightly just to add minor flush.


 The same look using NYX #117 lashes and only NYX Pandora on the lips, no Galaxy.

 Do you have some tips of your own that have helped you accomplish certain looks? If you would like to share them, please do so in the comments or email them to us!
Share and Enjoy your MakeupFix!
Do you have some tips of your own that have helped you accomplish certain looks? If you would like to share them, please do so in the comments or email them to us!
Share and Enjoy your MakeupFix!